Mount Rainier National Park
Mount Rainier is one of our favorite parks and one of the many reasons we chose to move to Seattle in 2015. The centerpiece is obviously the mountain itself standing at 14,410 feet towering over the landscape and serving as the backdrop to the city of Seattle. Rainier is the most glaciated peak in the Lower 48 and has way more glaciers on it than all of Glacier National Park combined. It is also an active volcano which we hope never goes off in our lifetime. While the main attraction is the mountain – there is also tons of amazing alpine lakes, meadows full of wildflowers in July/August, old growth forests, and tons of wildlife as well.
Most Recent Visit
August 2020
When to Go
You are going to want to visit this park in the July to August time frame. You could try June or September as well – but June may be too early as snow will likely still be blocking a lot of trails and September may be too late as the weather starts to turn questionable. July and August are typically the months when a lot of trails at higher elevations become passable and also when the wildflowers come into bloom. At over 14,000 feet – you don’t get a long visitation season unless you are into winter sports and nothing is guaranteed even in July or August from a weather standpoint. We have had our best luck in mid-August, but you have to remain patient as the mountain creates it’s own weather and there are several days when you wouldn’t even know a mountain exists because it is so clouded over.
How to Get Here
Getting to the Mount Rainier National Park is pretty simple – fly to Seattle. Every major airline flies here and once you get your rental car – it is only a 2-hour drive to get to about any spot in the park. While you are at it – remember that Olympic National Park and North Cascades National Park are also within a few hours drive of either the airport or Mount Rainier if you want to extend your vacation – not to mention all the famous sites in Seattle like Pike Place Market and the Space Needle.
Trip Length
The park is split up into five main areas with the two most popular, by far, being “Paradise” and “Sunrise”. If you like hiking – you could spend as much time as you want here whether it be 2 days or 2 weeks and you won’t get bored. If you are not a hiker – one or two days would be plenty but you will miss out on a lot of what this park has to offer besides mountain views. If you end up with extra time – there are tons of things to do in Washington state. Whether it be more National Parks like Olympic or North Cascades, sightseeing in Seattle, or even visiting Mount Saint Helens to see the destruction of that volcanic eruption – you will have plenty to keep you busy.
Where to Stay
If you like camping and are able to bring your gear with you or rent it from somewhere like REI – that is our preferred approach as there are many inexpensive campsites in and around the park. We have stayed at both Silver Springs and Lodgepole campgrounds outside of the eastern edge of the park. If you don’t like or don’t have that option – there are several lodges in and around the park as well. Just be prepared to pay more than your average hotel for this comfort and convenience – easily over $200 per night. You could also stay further out to reduce that price tag and just deal with the longer drive in each day. As mentioned above – it’s only 2 hours from Seattle – so if you are willing to drive some each day – you have tons of lodging options. Just keep in mind that the Paradise and Sunrise areas tend to fill up parking wise by 10am each day – especially on weekends.
What to Do
As mentioned above, Mount Rainier is best done by area. We have broken the park up into five main areas below. We are going to start the trip in the area most visitors first come upon as they enter from the western edge of the park via the Nisqually Entrance (Longmire) and then move counterclockwise to Paradise, Ohanapecosh, Sunrise, and Carbon River/Mowich. It’s important to note that as of 2024, some areas in Mt. Rainier NP require a reservation/timed entry during peak season. In 2024, that peak season was between May 24-Sep 3 (Paradise area) and Jul 4-Sep 2 (Sunrise area) during the hours of 7a-3p. Please see the park website for more information.
Longmire Area
When entering via the Nisqually entrance, the first area of the park you come across is not the most impressive – but still interesting, nonetheless. For history buffs, it might be the most interesting stop in the park. Park Headquarters was located here in 1899 when the national park was established and there were also early homesteads here – one of which belonged to James Longmire. Longmire tried to turn this area into a mineral spring resort as well which worked for a number of years before shutting down. The Longmire Museum will lay out all of these details with some interesting exhibits. If you are lodging inside the park – you are probably staying at the National Park Inn which is also located in Longmire.
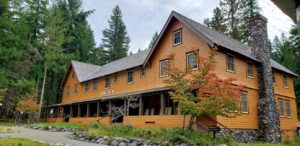
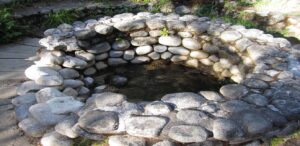
There are two walks we recommend in this area and another we have heard good things about – but haven’t yet tried ourselves:
Trail of the Shadows — 0.7 miles RT, Easy, 30 minutes
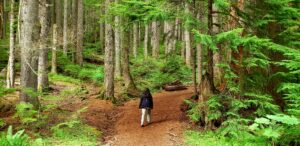
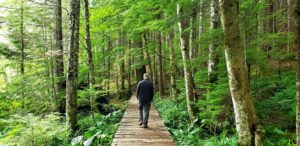
This trail is located right across from the museum parking lot and will take you back in time as you walk through the previous homesteads, mineral hot springs, and the surrounding forest. There are interpretive signs along the route talking through what it may have been like back in the early 1900s in this area.
Christine Falls — 0.1 miles RT, Easy, 15 min
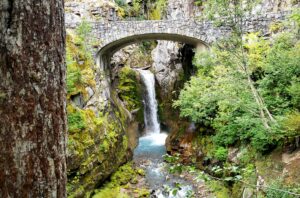
This is more of a pull off the road versus a hike/walk – but you should absolutely stop here for a few minutes. This isn’t a towering waterfall that will take you breath away – but it is still stunning when you get to the viewpoint as the waterfall will be framed by the stone bridge you drove over making for a a great photo opportunity.
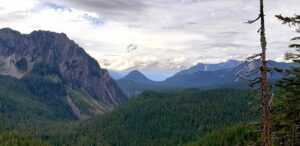
Carter Falls/Madcap Falls via Wonderland — 2.5 miles RT, Moderate, 2 hours
We have not yet hiked this trail but have heard great things. If you have some extra time – give it a shot! We will update here once we have a chance to hike it.
Paradise Area
This area truly is a Paradise. This is by far the most popular area of the park and parking lots will fill up by 10am on most days – so try to arrive early if you can. You can start the day off with a visit to the Henry M. Jackson Memorial Visitor Center – the main visitor center in the park. You can watch the park movie, grab some souvenirs, and grab some food at the onsite cafeteria. You should also talk to a ranger to figure out what the current trail conditions are. Many of the trails around the visitor center are partially snow covered until at least July each year – and the highest elevation trails will be snow covered all year. This area gets over 50 feet of snow every single year!!
While you could certainly just take a photo from the parking lot of Mount Rainier and call it a day – you would be missing out on a lot this area has to offer – waterfalls, lakes, amazing wildflower displays, and plenty of wildlife. It should be noted that we are writing this from the perspective of a summer trip. We haven’t done a winter trip – but this is the main area for winter sports as well as the park service does a good job of keeping the road from Longmire to Paradise plowed during the many winter months.
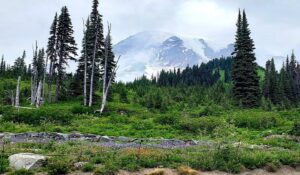
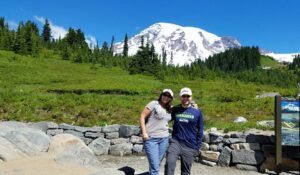
The trail map at Paradise can be quite confusing. There are over 10 trails that take off from the visitor center which crisscross each other and share paths. The recommended hikes below will get you to pretty much all of the main highlights:
Skyline Loop via the High Skyline Trail – 5.7 miles RT, Strenuous, 4.5 hours
This is the major hike of the area and one that not everyone will be comfortable taking on. You will climb 1700 feet in just the first couple miles of this hike before slowly descending over the final 3.5 miles. As mentioned above, there are all kinds of other iterations you can do if you don’t want to do the full Skyline Loop – but check with a ranger to make sure you know which turn to take when. Scott has done this hike two times now – once on a perfectly sunny day with great mountain views and once where it was so cloudy that the mountain only popped out for a few minutes during the ~5-hour hike. Regardless of the weather – it is still an amazing hike.
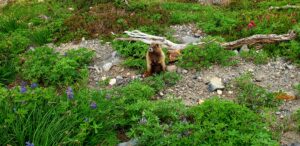
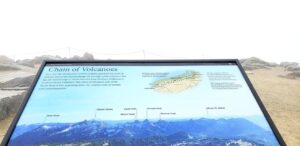
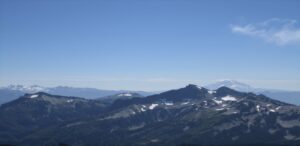
As you work your way up to Panorama Point (it is almost straight up) – make sure to be on the lookout for bears, deer, and of course marmots which are usually everywhere. You will likely hear the marmots whistling to each other during your hike as they keep watch for any dangers to their friends and family. Also make sure to take in the scenery around you. It can be easy to focus on the mountain which you will stare at your entire way up – but make sure to look around and behind you as there are many other mountains to go along with wildflowers, waterfalls, and lakes to take in. At the same time – make sure you watch where you are stepping as you will usually start to come across piles of snow between Glacier Vista and Panorama Point and you don’t want to be the one who slips and falls (although it happens all the time). Once you reach Panorama Point – take a break and eat some lunch or just relax. On a clear day (which isn’t too often) – you can see Mount Adams, Mount Saint Helens, and Mount Hood from this point which is amazing. On a cloudy day – you may see nothing but the hand in front of your face as you are currently hiking in the clouds at 6,800 feet.
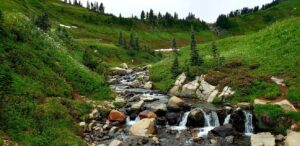
After your break – you are not done going up yet. You’ll have about 300 more feet of elevation to ascend via the High Skyline trail. There is an opportunity to skip this – but is totally dependent on how hard the previous winter was and the time you visit. There is a shortcut over to the other side of the loop by crossing a snowfield which starts at Panorama Point – but it can be pretty dangerous and therefore we would recommend just heading up the High Skyline Trail. You will get more good views of the mountain and the valley below on a sunny day and plenty more opportunities to cross snowpacks which always adds an interesting twist to the hike.
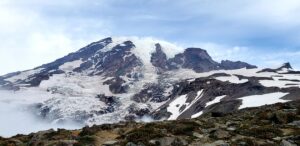
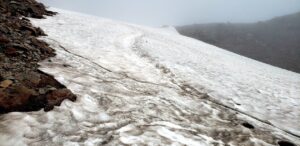
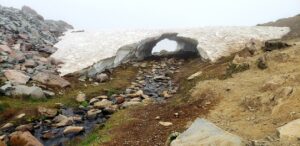
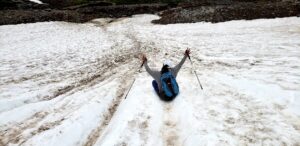
Once you start to descend, you will start to see more in the way of waterfalls, and you will actually cross even more snowpacks than you did on the way up. Some of them can be quite interesting to figure out how to descend. You will find yourself taking a couple minutes to contemplate your strategy before taking each of these on which can include walking slowly, sliding on your feet, sliding on your behind, or even running down believe it or not. If you fall – believe us – you aren’t the only one to have done that today, so don’t get embarrassed. Watch for “snow arches” on your way in as well where a stream has cut through a snowpack and left an arch above – they are pretty cool.
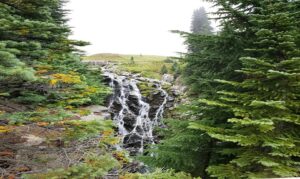
As you close in on the end of your hike – make sure to stop at Myrtle Falls which is the closest you are able to get to a waterfall on the hike. From there it is just another half mile to the parking lot and this last portion is filled with wildflowers and amazing non-Rainier mountain views.
Nisqually Vista Trail – 1.2 miles RT, Easy, 45 minutes
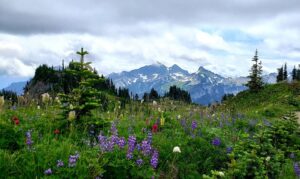
If you are not up for the strenuous hike above but still want to experience what Paradise has to offer – this hike is for you. It is only a 200-foot elevation gain and you will get great views of Rainier (if a clear day) and will get to walk through meadows full of wildflowers. You will also likely get to see some wildlife – possibly bears, but more likely deer or marmots here.
Bench and Snow Lakes Trail – 2.2 miles RT, Moderate, 2 hours
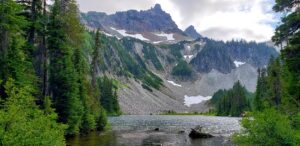
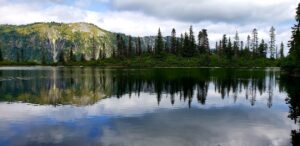
This trail is not located at the visitor center. You will have to head down the park road a couple miles to find this popular trail. This comes with a 700-foot elevation gain which is spread out over the hike as you will go up and down several times. You will first come across Bench Lake where you can descend a fairly steep drop-off to its shores. If Mount Rainier is out on a clear day though – it is worth it as you will have the mountain as a backdrop to the lake and will also have its reflection in the lake. If a cloudy day (like when we did the hike) – you could probably just stay up on the main trail and take a picture from there. Once you are done here, you can continue on to Snow Lake which is much easier to get to the edge of. You have a nice backdrop as well to this alpine lake which makes for some great pictures. Keep in mind that both Bench and Snow Lakes can be frozen into late July each year – so factor that into your decision to do this hike.
Ohanapecosh Area
Similar to Longmire, this is another fairly small area – but there are a few things to do here. There is a visitor center where you can view some exhibits and talk to a ranger. When you are done with that, there are several short trails that are worth your time.
Grove of the Patriarchs – 1.3 miles RT, Easy, 1 hour
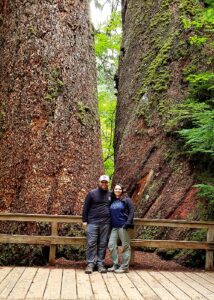
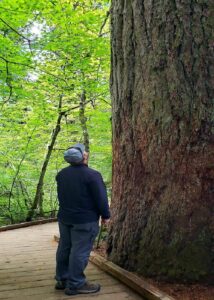
This hike is all about the old growth forest. There are some monster trees on this trail which make for some great pictures – especially if you try to stand next to one to show off its immense size. It is mostly Douglas Fir and Red Cedar trees – many of which are over 1,000 years old. That was around the time that Viking raider Leif Eriksson discovered North America for those keeping track. In addition to the mind-boggling size and age of these trees – there is also a long suspension bridge that only one person is allowed to cross at a time over the Ohanapecosh River. During high visitation times – there is typically a line to cross on both sides, so be prepared to wait a while.
Silver Falls – 1.0 miles RT, Moderate, 45 minutes
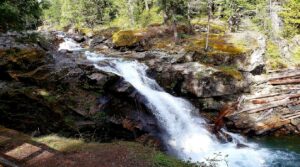
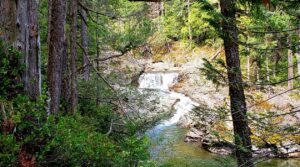
There are a number of possible trails to Silver Falls. The one we would recommend is the right off of Stevens Canyon Road and is only a mile compared to close to three miles from the Ohanapecosh campground. Regardless – you are still going to deal with a 300-foot elevation change over a pretty short trail – so that is why this is rated as moderate. It is worth it though as you will come to a 75-foot waterfall that has some pretty good power behind it. Not to mention the rest of the hike will be a nice peaceful walk in the woods.
Hot Springs Nature Trail – 0.5 miles RT, Easy, 20 minutes
This is a super short walk through more Douglas Fir and Hemlock trees which starts at the visitor center. You will eventually come across some bubbling hot springs which are interesting to look at and the trail only takes 20 minutes – so you might as well stop and look before leaving the visitor center!
Sunrise Area
This is the other main (and popular) area of the park. It is actually the highest elevation you can get to by vehicle at 6,400 feet. The road to Sunrise doesn’t even open until the June/July timeframe and it will close off by October typically – so plan your visit accordingly if you are interested in this area. There is another visitor center here – though not nearly as nice as the Paradise version. Similar to Paradise – you could take an amazing photo of Mount Rainier from the parking lot and move on – but you would again be missing a lot of the incredible scenery this area has to offer.
If you pick up a trail map at Sunrise – it can be overwhelming as there are over 10 trails to choose from. However, you will notice that many of them crisscross each other right next to Frozen Lake (1.5 miles away from the visitor center with 500 feet of elevation). This allows you to combine many of these trails into one 8.6-mile hike which I will describe below.
Sourdough Ridge Trail West – Mount Fremont Lookout – Burroughs Mountain Trail – Sunrise Rim Trail Combination – 8.9 miles RT, Strenuous, 5 hours
This combination of trails will take you up about 1,600 feet in total – so it isn’t easy, but it is so worth it. If you wanted to make a shorter version of this – you could cut out Mount Fremont which would take you down to 6.0 miles with a 1,200-foot gain and it would truly become a loop trail. You start this wonderful hike just to the left of the visitor center bathrooms on the Sourdough Ridge Trail West and head up 500 feet until you reach Frozen Lake. Frozen Lake is exactly how it sounds – frozen most of the year. By mid-August, it is mostly water, but there are still remnants of the snowpack which covers the lake most of the year.
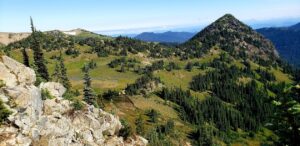
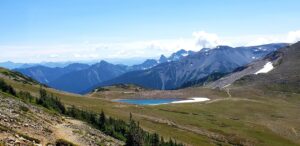
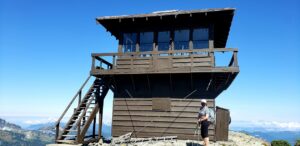
Once you walk by Frozen Lake, you will come to a trail intersection which offers you choices in all directions. We recommend doing the out and back 2.6-mile round trip to Mount Fremont Lookout first. This will take you up another 400 feet to an old fire tower which has become famous for its views of Mount Rainier and the surrounding valley. On the way, you are also very likely to see mountain goats in the valley below the trail. We saw about 30 of them on our hike.
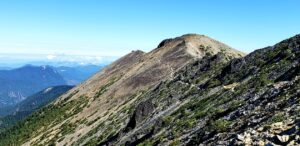
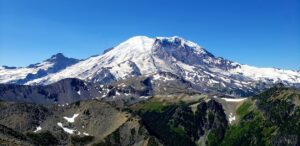

When you return to the trail intersection by Frozen Lake, we would recommend continuing on to the First and Second Burroughs Mountain peaks. This will take you up 400 feet to the first Burroughs Mountain and then another 300 feet to the second Burroughs Mountain. Along the way – you will have incredible views of Mount Rainier and the surrounding wilderness. At the top of the second Burroughs Mountain, you will be standing at 7,400 feet which is one of (if not the) highest point in the park that non climbers can easily reach. You will feel like you are right on top of Rainier from this location assuming it is a clear day.
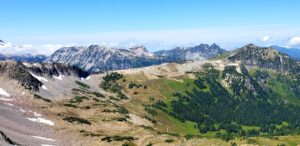
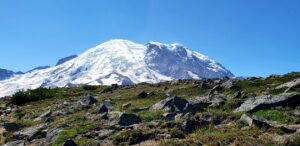
Once you are done taking in the views from atop the second Burroughs Mountain – you will double back 0.6 miles to the intersection with the Sunrise Rim trail which will start your descent back to the visitor center which is now 2.6 miles away. This trail offers amazing views of the Emmons Glacier, which is the largest glacier in the Lower 48 today, as well as the valley the glacier has carved out as it receded. You are also likely to come across some snowpacks which you will have to traverse, some of which can be scary as there is a sharp drop-off if you were to fall. You will eventually come across Shadow Lake which is another good resting point while you take pictures of the lake and the backdrop of evergreens. From this point on, your main focus will likely be on the meadows where beautiful wildflowers are located in the late July/early to mid-August timeframe. If you are lucky, it will be a clear day, and you can get some wildflower shots with Mt. Rainier in the background.
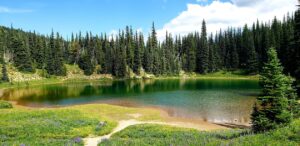
Silver Forest Trail – 2.7 miles RT, Easy, 1 hour
You could tack this on to the combo hike described above as it intersects near the end of the Sunrise Rim Trail, but this is also easily done on its own as it is an out and back trail taking off from the visitor center parking lot. You will get great views of Rainier and the Emmons Glacier on a clear day as you walk through the meadows full of wildflowers. You may also spot a fox or two as they are common around this area.
Emmons Moraine Trail – 4.2 miles RT, Moderate, 2 hours
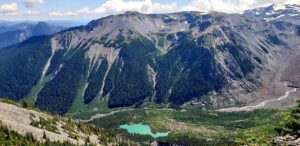
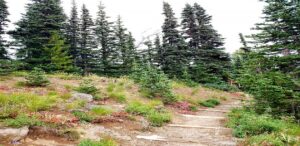
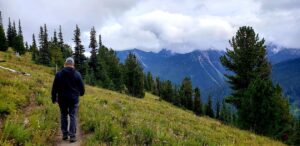
This trail is not located up at the visitor center, but instead down by the White River campground which is much closer to the beginning of the Sunrise Road. There is a parking lot within the campground to pull into and then you have about a .3 mile walk to the trailhead. You will see people carrying a lot of gear with them here as it is also a launching spot for climbers as they head out to the Glacier Basin camp which is a much longer hike on mostly the same trail. You will spend the first park of the hike mostly going up through the forest (you’ll ascend about 700 feet) before you come to a trail split where you will head left to Emmons Glacier. In about a half mile, you will come to a clearing with an amazing view of the largest glacier in the Lower 48 right next to Mount Rainier. You will also have a clear look back at the valley which has been carved out by the glacier which includes a very cool turquoise lake (not sure what the name is or if it even has a name).
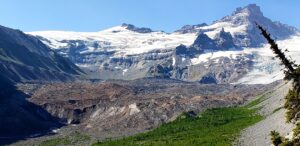

Palisades Lake Trail – 7.2 miles RT, Strenuous, 5 hours
We have not done this hike yet but have heard it is worth the effort of climbing 1,800 feet. You won’t get any views of Mount Rainier, but it does offer many beautiful alpine lakes along the way. You can reach the trail view the Sourdough East Trail which would add a few more miles as it takes off from the visitor center – of you could park at Sunrise Point if you can find a spot and take off directly from there.
Naches Peak Loop Trail – 3.5 miles RT, Easy, 2 hours
We haven’t done this trail yet either, but it is billed as one of the most popular hikes in the entire park. This is technically part of the Sunrise area – but nowhere near the visitor center and it isn’t even located on the Sunrise Road. You will need to head east on Highway 410 for a few miles to come across this hike near the park border in Chinook Pass. You will actually spend a lot of time hiking on the Pacific Crest Trail here as well. We have heard the views are amazing and will update here once we have a chance to check this hike out!
Carbon River / Mowich Lake Area
We have not yet been to this area – but it is on our list to check out soon as we have heard there are some really cool hikes here. This area is super hard to reach for the average person as it is off on it’s own disconnected from the rest of the park and park roads. They are located on the very northwest corner of the park which is likely the wettest area in the park as it resembles more of a rainforest than anything else. The road to Carbon River actually was washed out in 2006 – so you either have to hike or bike in for 4 miles before reaching any trailheads. While the road to Mowich Lake is still there – it is a super rough unpaved road which prohibits many people from actually getting there unless you have the right type of vehicle.
We will update here once we are able to visit!
